
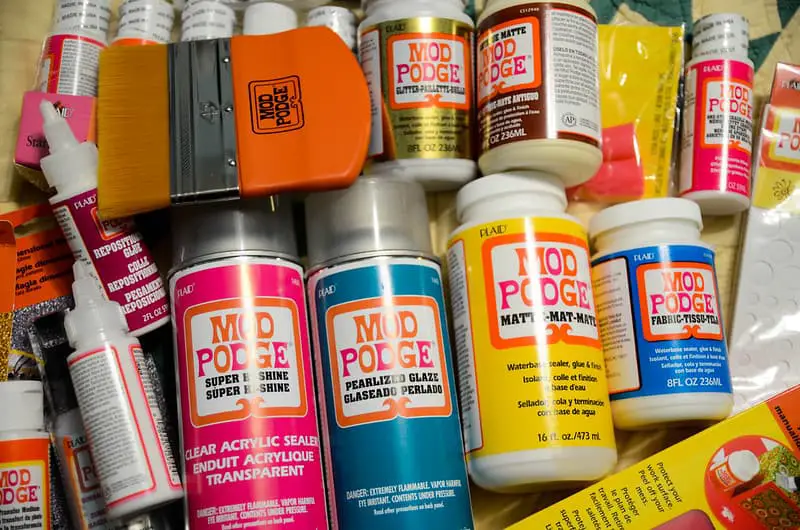
Mod Podge can be used for so many different projects, making it the perfect addition to your collection of art supplies. It can be used for a wide variety of things including decoupaging and sealing. It can adhere to several different surfaces, but is Mod Podge one of those surfaces it can stick to?
So, can you use Mod Podge on cardboard? Yes, absolutely! Mod Podge is perfect to use on cardboard for sealing, photo transfers, and decoupage. The only thing that you need to be careful with is thin cardboard. When the cardboard is on the thin side, you run the risk of wrinkles when you use Mod Podge.
If you properly apply Mod Podge to the surface of cardboard, you will not have anything to worry about. You can prevent wrinkles and have your cardboard looking great when you are finished. The process is easy, simple, and works almost the same as using Mod Podge to seal a painting.
How to Seal Cardboard With Mod Podge
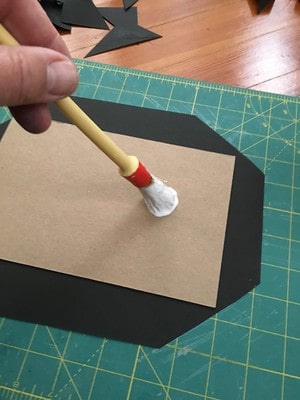
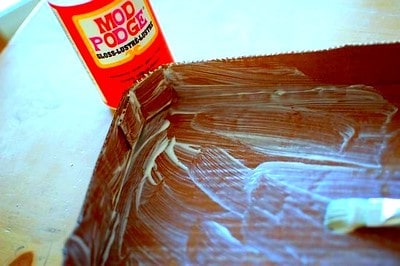
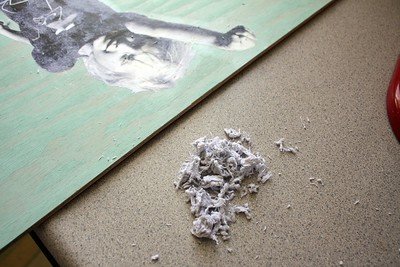
Using Mod Podge to seal cardboard is incredibly easy. First, if you are trying to seal a painting on the cardboard, you will need to wait for the paint to dry completely before you can apply the Mod Podge. If the paint is still wet, it can bleed into the Mod Podge and leave everything looking streaky and messy.
When you are confident that the paint is completely dry, you can start adding the Mod Podge to the surface. Moving from the top to the bottom or from the left to the right, start applying the Mod Podge in thin layers. Working in one direction will help you keep track of where you have already applied the product.
Let the first layer dry for about 30 minutes before you go on to apply a second layer. It is recommended to apply at least two layers, but you can add a third if you need. Leave the final layer of Mod Podge to completely cure before you try to move the cardboard.
Can You Waterproof Cardboard With Mod Podge?
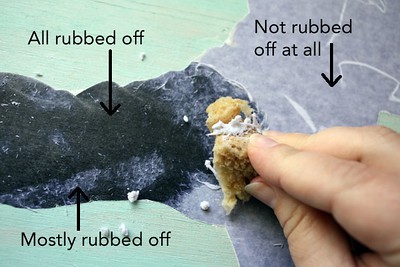
Mod Podge is not waterproof, so you can’t use it to make cardboard waterproof. Mod Podge is a water-based product, so it can be reactivated when it comes in contact with water. Mod Podge can be exposed to a few drops of water and be just fine, but it can’t be exposed to large amounts of water.
There is one type of Mod Podge that is waterproof, but people tend to use it more on painted ceramics that will be placed in the dishwasher. It’s called the Dishwasher Mod Podge, and you can safely put your painted items in the dishwasher after you seal them with Mod Podge.

However, even the dishwasher safe Mod Podge formula isn’t completely waterproof. It is highly durable but isn’t formulated for constant water exposure. If you need a waterproof cardboard, it is best to find a different sealant to use.
I recommend using Aleene’s Acrylic Sealant Spray. It’s a bit more durable and waterproof than Mod Podge, if you plan on having constant exposure to your painted item.
How to Photo Transfer Pictures With Mod Podge
Mod Podge has a really awesome product that makes it easy to transfer pictures onto a surface. You can use just about any surface, including cardboard. It can be easy to think that this product is just regular Mod Podge with a different label, but this isn’t the case. This formula is specifically designed to transfer pictures to other surfaces.
This Mod Podge Photo Kit is exactly what you need to get started. I highly recommend this kit if you plan on using Mod Podge to transfer photos.

The first thing you need to do is prepare the surface you are going to be transferring onto. If you want the photo to have a nice, clean border, then you are going to want to paint the surface before you try to transfer the picture. It is recommended to apply just two layers of the border color for the best look.
Next, you will need to make a photocopy of the picture you want to transfer. You will never use the actual picture for a transfer because the photo paper is too thick to work properly with the transfer medium.
Make a copy of your desired picture with a dry toner copier. This will give you the best possible results during the transfer. If your photo has numbers or words, you will need to flip the image, so it is opposite and mirrored when copied. This will ensure that the letters and numbers turn out facing the right direction. If your picture doesn’t have words or letters, this isn’t as important.
When you get the picture properly copied, you will need to trim it down to fit the surface you have prepared. After you have trimmed the picture, lay it down on a covered surface with the image facing you. Start to apply the Mod Podge transfer medium to the image.
Apply the product as evenly as you can and make sure you are covering every part of the image. You can apply the transfer medium with a regular brush or a squeegee to easily spread the product. When the image is sufficiently covered, very carefully pick it up and avoid touching the surface of the image.
Turn the picture over so the image is facing down on top of the surface you prepared. Carefully start smoothing out the surface of the picture to remove any air bubbles. Start in the middle and work toward the outside for the best results. As soon as you have the picture applied to the surface, let it sit for 24 hours.
After 24 hours have passed, grab a cellulose sponge and get it wet. Start dampening the back of the picture and let the water soak into the picture. You will start to notice the paper is rolling, and you can peel it away. After all the paper is removed, your image is transferred.
How to Decoupage a Cardboard Letter With Mod Podge
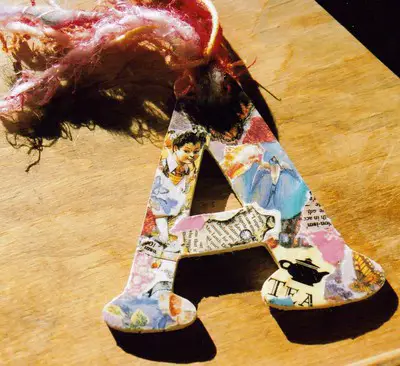
Photo letters are extremely popular, and many people are making them with cardboard. The process is super easy and can be a fun project to work on with friends or family. You will start by creating your letter. Cut it out with an Xacto knife or some sharp scissors. After you have your letter prepared, lay out the pictures to see how you want them placed and take a picture to remember.
Apply Mod Podge to the surface of the cardboard and the back of the picture. Lay your first picture down and smooth it out starting in the middle to get rid of any air bubbles. Repeat this process until all of the pictures are placed.
When all of your pictures are in place, apply a thin layer of Mod Podge over the entire surface. Wait about thirty minutes for it to dry, then apply a second layer. Let the second layer completely cure for a few days before you try to do anything with your new cardboard letter.
Final Thoughts
Mod Podge is a product that can be used for a wide variety of projects and on just about any surface. One of the surfaces that Mod Podge works great on is cardboard as a sealant and a decoupage. You can easily add pictures or paint to cardboard and seal it.
The downside of Mod Podge is that you can’t use it to make cardboard waterproof. Mod Podge is highly water resistant, but it isn’t designed for frequent water exposure. If you need to make the project waterproof, you will need to use a different type of sealant.
Make sure to follow all my tips and recommended products to ensure your Mod Podge project turns out great! Also, don’t forget to check out my other articles for all your painting Q&A’s. Happy painting!
