There is nothing more frustrating than priming a canvas with gesso just to find out that it’s cracked before you go to paint on it. This can change your mood about the entire project, and you might just want to throw the towel in.
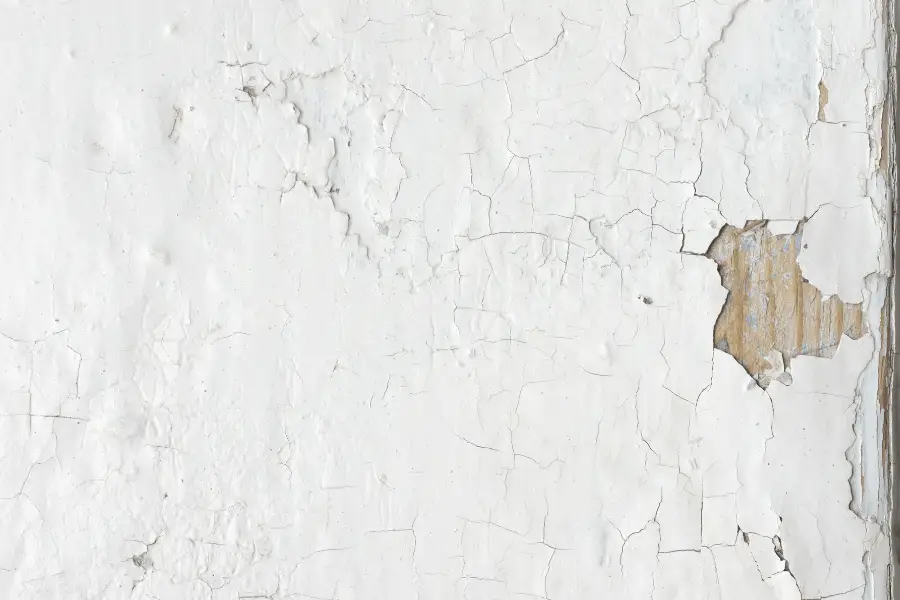
So, why is your gesso cracking? If your gesso is cracking, there are two main reasons. First, you applied the gesso too thick. Gesso performs best when applied in thin layers. Second, you didn’t allow enough dry time between coats. You need to allow proper dry time for one coat before adding the next.
These two reasons are the most common for your gesso cracking. When your gesso cracks, you are likely going to wonder if you can fix it, paint over it, or if you should just start fresh. It depends on how bad the cracks are, but in most cases, you might be able to fix it before you start painting. Let’s read on to see how to fixed dried gesso!
How to Fix Cracked Gesso

As gesso dries on the canvas, it shrinks. This causes it to crack when you aren’t expecting it. This is most common when you don’t allow the gesso enough time to dry between coats. If you apply too much at one time, it will shrink at a faster rate and also cause cracks.
My favorite gesso to use for my acrylic paint and oil paint projects is Mont Marte Gesso. It offers amazing coverage, and it’s super affordable. I highly recommend it if you’re priming prior to painting.

If you notice cracks in your gesso, it is easy to get frustrated. When the cracks are just tiny, hairline cracks, it is very likely that you will be able to fix them. You will need to grab a damp cloth and your canvas to start.
With your damp cloth, you are going to rewet the surface of the gesso. Gently work the wet gesso into the cracks to seal them. You can also try using a very small paint brush to fill in the cracks.
This will not need the gesso that’s already on the canvas, but it might leave visible changes in consistency.
If the cracks are deep and larger, you can try to sand off some of the gesso and try again. This is likely caused by your layers of gesso being too thick. You will need to sand off the top layer or layers until you reach the bottom.
When you are on the last layer of gesso, there is a chance it might still be wet. If it is, smooth out the layer of gesso and let it dry completely before you go back and add another layer. This should fix the problem and prevent any more from forming as the gesso dries.
Can You Paint on Cracked Gesso?

It might be tempting to just paint over the cracks in the gesso instead of fixing them, but it isn’t recommended. When the paint comes in contact with the cracks, it will absorb deeper into the material than the uncracked gesso.
As this happens, your paint will appear uneven and not flat as it should be. You would have to try to compensate for that by adding more layers of paint until the paint is the same level and same color across the canvas.
During the painting process, it might even seem like the paint is doing just fine over the cracked gesso. As time passes and the paint dries into the gesso, the cracks will once again be visible and will make your painting look cracked and broken.
It is highly recommended to try to remove the cracks before painting or start on a new canvas completely. If you know what caused the cracks the first time, you can prevent them when you try again. This will take less time and be less frustrating than trying to paint over the cracks.
However, if your art is going to be enhanced by the cracks, then by all means you can keep them. They might be beneficial for rocky scenes or trees. They can also help you create a distressed look if you are trying to create an older building in your painting.
How Do You Clean a Gesso Brush?

When it comes time to clean your brushes, it can be easy to overthink the process. To clean gesso off of a paintbrush is pretty easy and very similar to cleaning acrylic paint off a paint brush. You can clean the brush with a mild dish soap or a brush cleaner.
I like to use this Paintbrush when I apply gesso to a canvas, or wood. It’s amazing quality and lasts a long time as long as you take good care of it.

There are some general guidelines to follow when cleaning gesso off your paintbrushes. First, you will need to wipe off any excess gesso with a cloth or a tissue.
Gently squeeze the bristles to get as much of the product off as possible. Do not pull on the bristles, just lightly squeeze.
Next, rinse the brush with lukewarm water. Do not use hot water because this can cause the ferrule (the metal piece that holds the bristles to the brush) can expand and cause the bristles to fall out.
Wipe the brush on a cloth to remove any paint that might have been stuck.
You will then need a mild soap or a gentle dishwashing liquid. Dab the brush into the soap and start a lather. You can do this in a separate container or your hand. Since gesso isn’t toxic, it won’t cause you any harm to use your hand if that’s easier.
Avoid using too much pressure when you are creating a lather. You will want to be very gentle and try to prevent any bent bristles. Take the process slowly and don’t rush. This will give you the best chance of keeping your bristles intact. If your bristles bend and break, you won’t be able to fix them.
Rinse the brush and repeat the process until you don’t see any of the gesso coming out anymore. If the brush is old, there is a possibility that it’s stained. This can make it harder to know when the brush is clean, but you will be able to tell when you only see clear water coming out.
After you get all of the gesso out of the brush, rinse one more time with warm water. This will get rid of any soap that is left in the brush. Shake the water off, then gently shape the brush head into the proper shape with your fingers.
If there is a ton of excess water, you can use a paper towel to remove some of it. Leave the brush to air dry. It is best to lay it on a flat surface and make sure it is not laying on its head. This could damage the shape and the bristles of the brush.
Final Thoughts
Cracking gesso can be extremely frustrating and can make you want to stop your project before you even start it. Luckily, there is a way to fix cracks before you start painting. If the cracks are small, you should be able to rewet the gesso and work it into the cracks.
If the cracks are larger, it might be best to sand off and start over. These cracks are usually due to the gesso being applied too thick. When you sand off the top layers of gesso, the bottom layer might still be wet. Smooth out this layer and let it dry completely before moving on to the next layer.
Make sure to follow all my tips and recommended products to ensure your gesso painted project turns out great! Also, don’t forget to check out my other articles for all your painting Q&A’s. Happy painting!

