If your plastic cutouts didn’t turn out flat, you might wonder if there’s a way to fix them. Instead of remaking the entire plastic cutout, there are more convenient options.
So, can you reheat Shrinky Dinks? You can quickly reheat Shrinky Dinks. You need to make sure the oven is up to temperature, then add the baking sheet back inside. Give the plastic pieces a few minutes to heat up, then remove them. You can flatten them by pressing on them with a spatula when they’re hot.
In this post, we’ll cover how you can reheat your designs and get the results that you want. Let’s begin!
How Do You Reheat Shrinky Dinks in the Oven?

Reheating Shrinky Dinks in your oven is easy. All you need is the instructions on the back of the kit they came in. Many shrink-plastic kits want you to heat the oven to 325°F (163°C) or 350°F (177°C), but they can vary.
After preheating your oven, follow these steps:
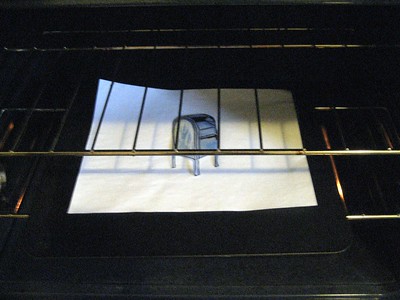
- Place a sheet of parchment or baking paper on your plastic cutouts.
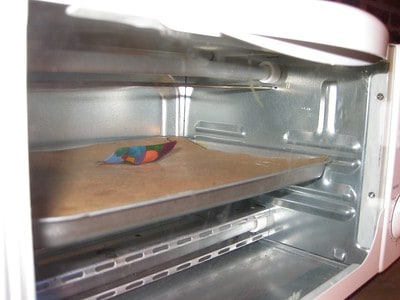
- Set the baking sheet with the cutouts back in the oven.
- Heat your designs for a minute or so. They might start flattening on their own.
- Carefully remove the baking sheet and set it on top of your stove.
- Press the parchment paper and Shrinky Dinks down with a spatula. You should feel them flatten.
- If they’re not hot enough, the plastic won’t move. Put it back in to bake for a few minutes, then try using the spatula again.
You’ll want to be careful when reheating your Shrinky Dinks. They might warp or form bubbles if you bake them too long. You’ll need to keep an eye on them and remove them after they flatten out.
Check out my other article that talks about Shrinky Dinks bubbling, and how to avoid it.
The Reheating Process for Shrinky Dinks

Reheating already-baked shrink plastic is a straightforward process. Whatever method you used to heat them the first time, you can use it again. Most people use their ovens, but you can also use hair dryers, heat guns, or toaster ovens.
Make sure your heating method is hot enough, then reapply the heat to the Shrinky Dinks. They won’t shrink nearly as much when you reheat them, but the heat is usually sufficient to make them pliable again. That way, you can reshape your designs as needed.
Generally, you won’t need to use the reheating process unless your Shrinky Dinks didn’t shrink enough or are warped, and you need to flatten them. You can avoid doing this by following the baking instructions on the kit’s packaging most of the time.
Overall, the reheating process for Shrinky Dinks is the same as baking them the first time, except that you don’t need to leave them in the oven for as long. Usually, just a minute or two is all you need for the Shrinky Dinks to be moldable again.
Factors To Consider Before Reheating Shrinky Dinks

It’s important to consider whether the Shrinky Dinks would benefit from being reheated. Sometimes, reheating shrink plastic leads to other problems, such as bubbling. It’s usually only a good idea for correcting warping or making the Shrinky Dinks lay perfectly flat.
If you think baking the Shrinky Dinks again would cause damage, it’s best to try fixing them using other methods or create a new plastic cutout from scratch. You’ll want to start making a test Shrinky Dink before every batch to see if they turn out how you want them to.

Shrinky Dinks also will only shrink to a specific size. Once they’ve reached that point, you can’t shrink them anymore, so reheating them wouldn’t do anything. Shrink plastic shrinks to about a third of your cutout’s original size and becomes much thicker. If it looks like it is already significantly smaller, you won’t be able to shrink it much more.
You’ll want to consider why you want to reheat the Shrinky Dinks you already made. Reheating the plastic could lead to more damage if you bake them again. Plus, Shrinky Dinks can only shrink to a specific size. If you want your designs to turn out even smaller, you’ll need to draw them smaller on the sheets.
Alternatives To Reheating Shrinky Dinks

You don’t always need to reheat your Shrinky Dinks. Sometimes, minor imperfections make your charms stand out more. You can simply leave your creations as is or make another batch using the experience you gained to get better results.
The shrink plastic you used to make your designs needs heat to change shape. You might be able to wear down the edges with a piece of sandpaper, but it won’t look as nice.
A hair dryer or a heat gun would be best if you want to make some small corrections. You also wouldn’t have to wait for the oven to reheat. Simply lay the Shrinky Dink under parchment, weigh it down, and hit it with hot air.
Then, shape it to lay flat using a tool. You’ll need to take care not to burn yourself or accidentally blow away the plastic cutouts. The plastic won’t become soft again until it’s heated through the entire way, so there aren’t many alternatives to reheating when you want to change its shape.
Final Thoughts
In short, you can reheat Shrinky Dinks very easily! All you need to do is reapply heat to them. For many people, that means putting them back into a hot oven. Although, you can also use a few other heat sources to get good results. You’ll need to reshape them quickly after removing the plastic from the heat so it doesn’t solidify again.
Shrinky Dinks are a fun and easy project, but sometimes they don’t turn out how you expect. Warping, curling, and bending can all happen when you want them to lay flat. Luckily, it’s easy enough to fix all of these problems by reheating the Shrinky Dinks for a few minutes. Once they’re hot, you can easily flatten the plastic.
Make sure to follow all my tips and recommended products to ensure your Shrinky Dink project turns out great! Also, don’t forget to check out my other articles for all your painting Q&A’s. Happy painting!

